Bathtub Refinishing Basics
bathtub refinishing, sometimes called bathtub re-surfacing, bathtub refinishing or bathtub rejuvenation is the procedure of refurbishing the surface of an old, cracked, faded or otherwise unsightly bathtub into a new, like-new state. Many people have given up on bathtub refinishing ideas because they are either not cost effective or take up too much time. Refinishing a bathtub can be a very do-it-yourself project if you have at least a rudimentary understanding of how refinishing bathtubs work and are willing to put in a fair amount of effort. If you are just refinishing your bathtub because you think it might look better than it does or because you want a more elaborate upgrade, you may be better served hiring a bathtub remodeler to come in and do the job for you.
The basic difference between bathtub refinishing and bathtub reglacing is that refinishing is done to change the look of the entire tub rather than just specific parts such as the rim, surface, or sealants. Many times, bathtub refinishing is done because the tub has worn out badly or because the owner wants a completely different look. Bathtub resurfacing takes advantage of existing holes, scratches, or cracks and uses special materials that allow the tub to be refinished, sealed, or repainted. Sometimes, bathtub resurfacing is done just to repair a problem area (e.g., a crack in the edge of the tub because of heavy use) and make the tub look better than it did the way it did when it was new. Whatever the reason for bathtub refinishing or resurfacing, it is important that you understand all of the steps before you start. Doing some research online will help you to learn all of the terminology and process that is involved in bathtub refinishing and will help you to make an informed decision regarding your next step in this fun and exciting project.
The first step in bathtub refinishing or resurfacing is cleaning, which typically requires an acid-free soap and a few minutes under a faucet running hot with detergent. This cleaning process will remove most of the old coating, but it may leave a small area of coating that is not reachable with a cloth or pad. In this case, it is recommended that you use new tub liner or a similar product to cover up the unsightly area.
If your bathtub is not heavily used, then it may be possible to clean it with an alkaline cleaner, bleach, or even hydrogen peroxide. These are also great alternatives to vinyl tile and they work well on older bathtubs as well. For a DIY bathtub replacement, you will need to follow the manufacturer’s directions exactly when you are working on the bathtub liner or the tiles.
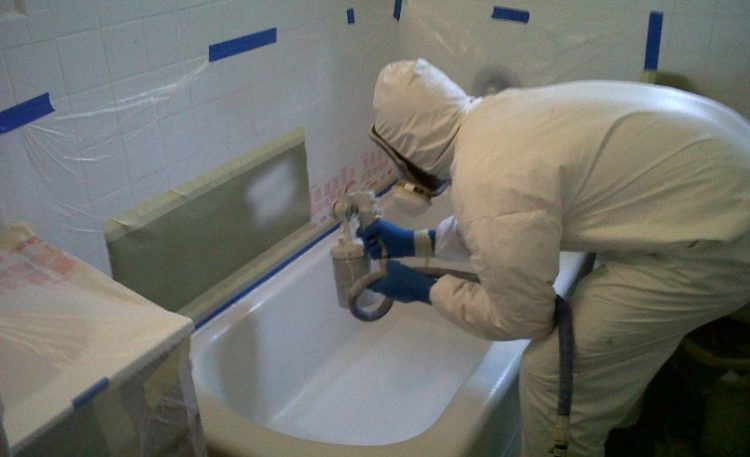
The second step of bathtub reglaze or renovation process is painting. Before you can even start thinking about color, you need to prepare the bathtub for paint. If your tub is painted a dark color, it will be nearly impossible to match the finish of your countertops, faucets, or sinks. Therefore, the only option is to paint a matching bathtub color to match the rest of the room. Many do-it-yourselfers choose to just use a color that complements the other fixtures and counters in the bathroom.
The last, and final step of bathtub refinishing is sealing. Sealing your old bathtub completely is a long and arduous process, but it can ensure the longevity of your tub and save you money in the long run. Sealing requires grinding down the old bathtub walls, adding chemical sealant, caulking, and finally sanding and painting. Once the restoration process is complete, you will find that your new bathtub is as lovely as it was when you bought it.